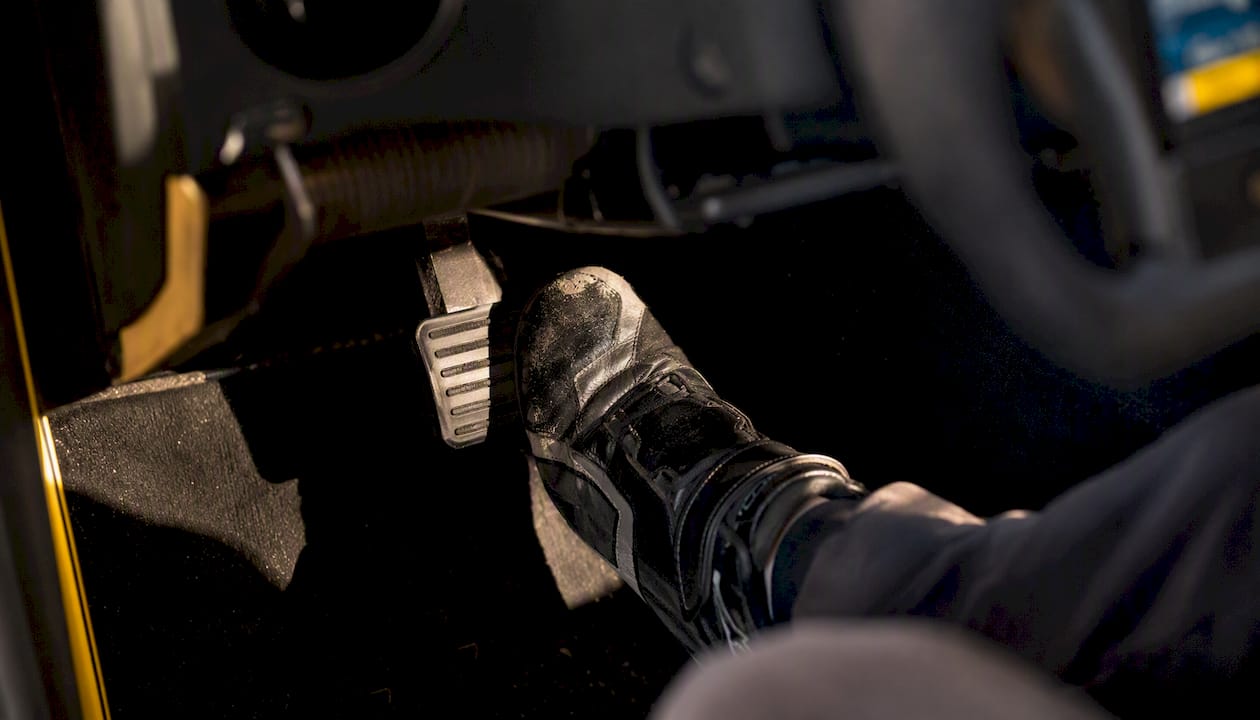
Your performance driving techniques checklist, in priority order: vision drill first, then straight-line braking, threshold braking, trail braking, cornering line (brake point, turn-in, apex, track-out), throttle control and weight transfer, steering technique, skid recovery, gear selection and heel-toe, mental prep, vehicle inspection, and post-session debrief. Start with the straight-line braking plus vision drill before anything else. It costs you nothing but a cone and an open stretch, and it builds the two skills every other technique depends on: pedal feel and where your eyes go.
Why start there? Braking is where most beginners lose control, and vision is what determines whether you brake at the right place. Get those two right and the rest of the checklist becomes learnable. Rush past them and you will spend every session fighting the car instead of driving it.
Quick-reference priority list (print this):
- Vision drill: look to the track-out, not the hood
- Straight-line braking: firm, progressive, full release
- Threshold braking: maximum deceleration without lockup
- Trail braking: carry brake pressure into turn-in
- Cornering line: brake point, turn-in, apex, track-out
- Throttle control: smooth, progressive, exit-speed focus
- Weight transfer: feel the car balance under braking and acceleration
- Steering: 9 and 3, smooth inputs, no hand-over-hand unless needed
- Skid recovery: understeer (ease throttle, look where you want to go) / oversteer (opposite lock, smooth throttle)
- Heel-toe downshift: match revs before releasing clutch
- Vehicle prep: tires, brakes, fluids, torque, helmet cert
- Post-session debrief: notes, instructor feedback, inspection
What does a complete performance driving checklist cover?
A usable track-day checklist breaks into five groups: pre-event planning, technical inspection, required safety gear, in-car skill goals, and post-session checks. The table below gives you the fast-reference version; the grouped bullets that follow add the pass/fail detail.
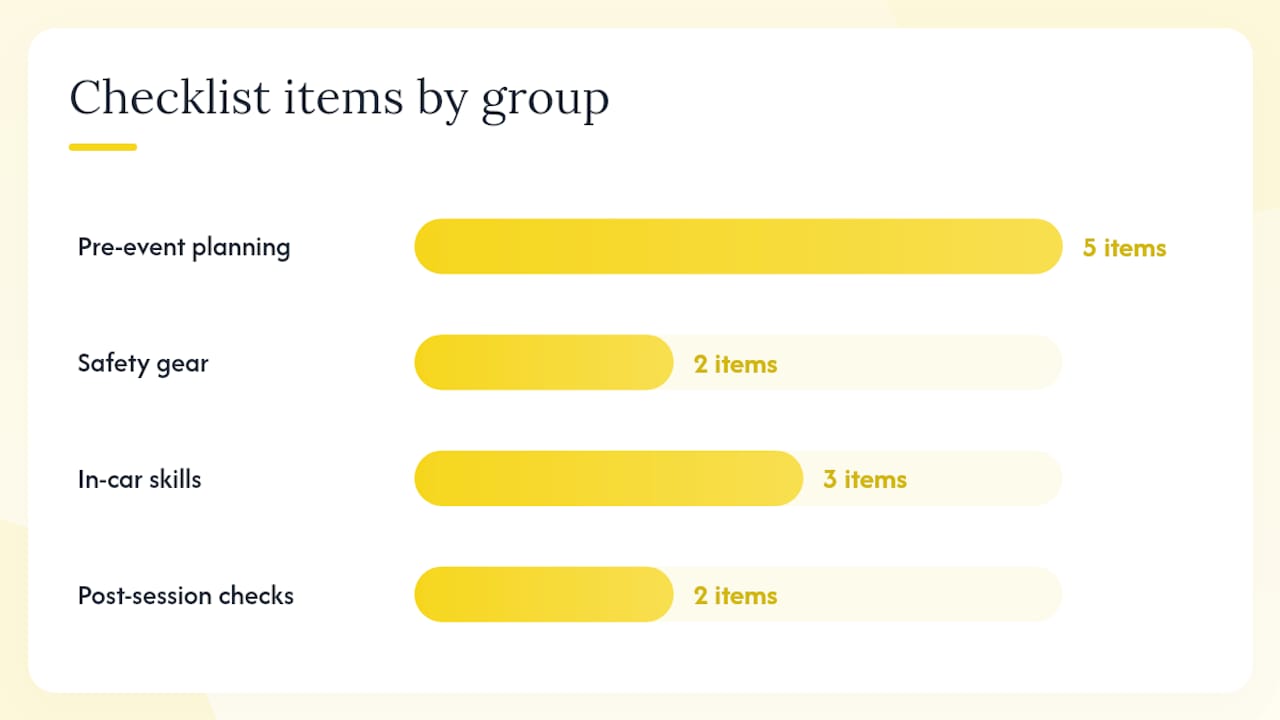
| Group | Item | Pass/Fail Criteria |
|---|---|---|
| Pre-event | Brake fluid type and boiling point | Use high-performance fluid suitable for track use |
| Pre-event | Brake pad thickness | Replace worn brake pads as per manufacturer recommendations |
| Pre-event | Tire tread and sidewall condition | No cracks, bulges, or cord showing; tread above wear indicators |
| Pre-event | Lug nut torque | Torqued to manufacturer spec; re-check after first session |
| Pre-event | Coolant and oil level | Full; no leaks; no milky discoloration |
| Safety gear | Helmet certification | Helmet certification as required by your event’s rules |
| Safety gear | Closed-toe shoes and long sleeves | Required at most HPDE events |
| In-car skills | Vision: look through the corner | Eyes on track-out before you reach the apex |
| In-car skills | Braking: complete before turn-in | No trail braking until Level 2 or instructor-approved |
| In-car skills | Steering: 9 and 3 hand position | Both hands on wheel at all times except shifting |
| Post-session | Brake rotor temperature check | No blue discoloration; no cracking on rotor face |
| Post-session | Tire pressure hot check | Record hot pressure; compare to cold baseline |
| Post-session | Debrief notes | Write down one thing to fix next session |
Must-do before your first session
- Confirm helmet meets the event’s certification standard (call the organizer if unsure).
- Remove all loose items from the car: floor mats, phone holders, water bottles, anything in the trunk.
- Torque all lug nuts to spec with a calibrated torque wrench.
- Check brake fluid: if it has been in the car more than two years, flush it before a track day.
- Set cold tire pressures and record them. You will compare these to hot pressures after session one.
- Attend the mandatory drivers’ meeting. Missing it can get you turned away.
Between-session daily checks
- Re-torque lug nuts after the first session and again after any session where you felt vibration.
- Check brake fluid level; a drop suggests a leak or boiling.
- Let brakes cool before checking rotor condition by touch or visual inspection.
- Record hot tire pressures immediately after exiting the track, then adjust cold pressures for the next run.
- Top off oil if consumption is above half a quart per session. Bring at least one spare quart per the track-day packing list from Track Minded HPDE.
Core techniques explained: braking, cornering, throttle, and vision
Braking
Finish your braking in a straight line before you turn in. That single rule prevents more off-track excursions than any other piece of advice at a beginner HPDE event.
Straight-line braking means applying firm, progressive pressure on a straight path so the tires share load evenly. Threshold braking pushes that pressure to the edge of lockup, which produces the shortest possible stopping distance. The skill is not maximum force; it is maximum force without crossing into a skid. ABS does this electronically, but feeling the threshold manually teaches you where the grip limit actually lives.
Trail braking is the advanced step: you carry a decreasing amount of brake pressure past the turn-in point, shifting load to the front tires and increasing their grip exactly when you need steering response. According to Speed Secrets’ performance driving materials, completing most braking before turn-in is the foundational principle, with trail braking introduced only after the driver has mastered the basic line and brake release. Do not attempt trail braking in your first HPDE run group.
Cornering line
The three reference points are turn-in, apex, and track-out. Turn-in is where you begin steering. The apex is the point closest to the inside of the corner, ideally hit at the geometric or late-apex depending on the corner type. Track-out is where the car reaches the outside edge of the track on exit. The Speed Secrets cornering guide frames this as “slow in, fast out”: prioritize exit speed because that speed carries down the next straight.
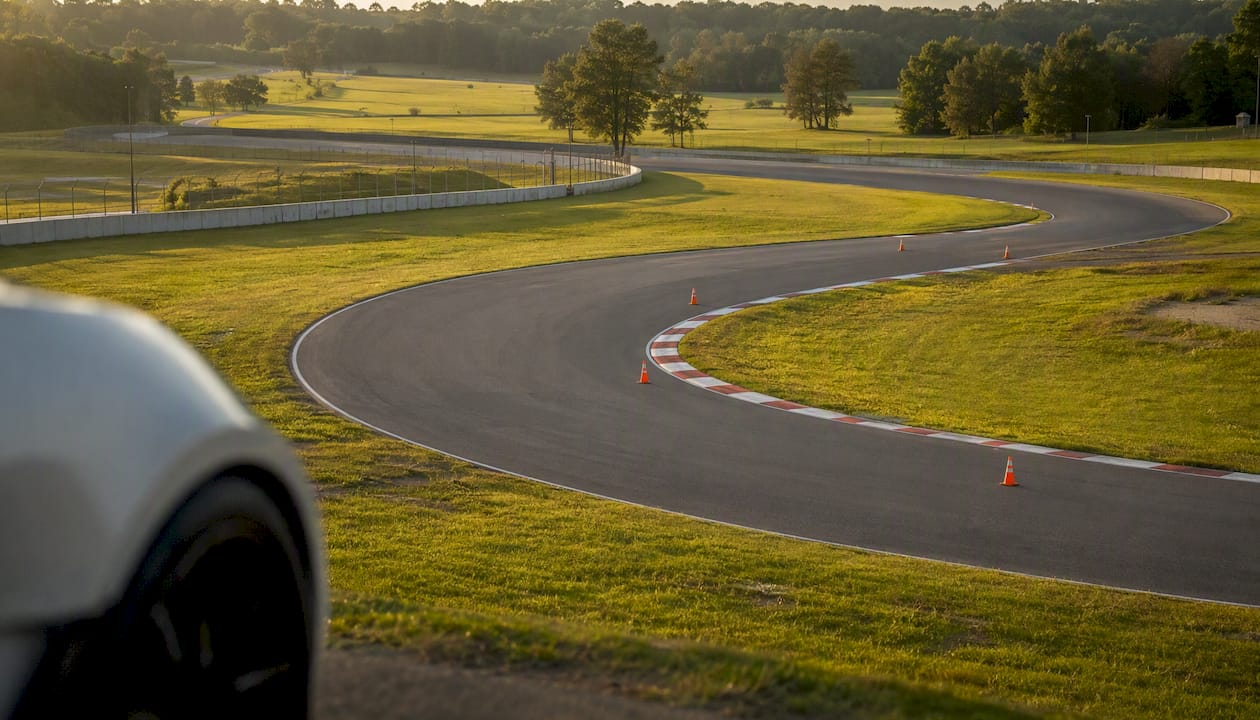
A late apex delays the turn-in slightly, which opens up the exit and lets you apply throttle earlier. Use it on corners that lead onto long straights. The geometric apex splits the corner evenly and suits tighter, technical sections where exit speed matters less than maintaining momentum.
Vision
Look where you want the car to go, not where it is right now. Your hands follow your eyes with a lag of roughly one second at track speeds, so if you are looking at the apex when you should be looking at the track-out, you will run wide every time. The drill is simple: pick a physical reference point at the track-out, and force your eyes there before the car reaches the apex. It feels wrong at first. It works immediately.
Steering
The AMG Driving Academy Performance Handbook is direct on this: keep both hands at 9 and 3 o’clock. Hand-over-hand is acceptable only for very tight, low-speed turns where the wheel travel exceeds what shuffle steering can handle. Never rest a hand on the gear lever between shifts; you lose feedback and you risk an airbag injury if the car gets unsettled. Smooth inputs matter more than fast ones. A sharp steering correction at speed loads one side of the car suddenly and can trigger a snap oversteer.
Weight transfer and throttle control
Every input you make shifts the car’s weight. Braking loads the front. Acceleration loads the rear. Cornering loads the outside tires. Understanding this lets you use throttle to balance the car mid-corner. If the front is pushing (understeer), ease the throttle slightly to shift load forward. If the rear is stepping out (oversteer), smooth throttle and opposite lock bring it back. The goal is a neutral, balanced car through the corner, with progressive throttle applied from the apex to the track-out.
“Prioritize exit speed over entry speed. A slow entry with a fast exit beats a fast entry with a slow exit every single lap.” — Speed Secrets Performance Driving Illustrated
Pro Tip: Focus on the end-of-braking reference point, not just where you begin braking. Knowing exactly where you release the brake is what gives you consistent turn-in balance and repeatable lap times.
Street vs. track warning
Trail braking, threshold braking at the limit, and late-apex lines are track techniques. On public roads, the equivalent is smooth, progressive braking well before a corner and a conservative line that keeps you in your lane. “Slow in, safe out” is the street adaptation. Never practice at-limit techniques on public roads.
How do you build performance driving skills with structured drills?
Skill progression works in one direction: control before speed. Every drill below follows that order. Rush the sequence and you will ingrain bad habits that take twice as long to fix.
Drill 1: Straight-line braking plus vision
Objective: Build consistent pedal feel and train your eyes to look ahead. Setup: A straight section with a cone marking your brake point and a second cone 150 feet ahead as your “look-to” target. Steps:
- Approach at a moderate speed (40–50 mph in a controlled environment).
- At the brake cone, apply firm, progressive pressure.
- Fix your eyes on the far cone immediately, not on the brake point.
- Release the brake smoothly and completely before the far cone.
- Repeat 10 times, noting whether your stopping point is consistent.
Target: Stops within one car length of the same spot on five consecutive runs. Safety note: Use a closed course or autocross lot. Have a spotter at the far end.
Drill 2: Slalom
Objective: Develop smooth steering inputs and weight-transfer awareness. Setup: Six cones spaced 60 feet apart in a straight line. Steps:
- Enter at 20 mph and weave through the cones using only shuffle steering.
- Keep both hands at 9 and 3 throughout.
- Increase speed by 5 mph each pass until inputs become rough, then back down.
Target: Clean passes with no cone strikes and no abrupt steering corrections.
Drill 3: Skidpad slow-radius
Objective: Feel the grip limit and practice throttle-balance corrections. Setup: A circle of cones with a 50-foot radius on a flat, open surface. Steps:
- Drive the circle at a steady speed that keeps the car neutral.
- Gradually increase speed until the front begins to push (understeer).
- Ease the throttle and note how the car tightens.
- Increase speed further until the rear steps out (oversteer).
- Apply smooth opposite lock and steady throttle to recover.
Target: Identify and correct both understeer and oversteer without leaving the circle. The Radford Racing School advanced program uses skidpad work as a core element of car-control instruction for exactly this reason.
Drill 4: Progressive trail-braking entry
Objective: Introduce trail braking into a wide, slow corner after mastering Drills 1–3. Setup: A wide, slow corner (90 degrees or more) with a clear track-out zone. Steps:
- Establish your baseline line using full braking before turn-in.
- On the next pass, carry 20% brake pressure to the turn-in point, then release.
- Feel how the front loads and steers more responsively.
- Increase the trail-braking distance by one car length per session, not per lap.
Safety note: Only attempt this with an instructor present or after completing an HPDE Level 1 program.
Sample practice day schedule
| Time Block | Activity | Duration | Safety Note |
|---|---|---|---|
| — | Warm-up laps, no pressure, sightlines only | 20 min | Stay 10 car lengths behind the car ahead |
| — | Skill Block 1: braking drill + slalom | — | Spotter at cone stations; escape route clear |
| — | Break: tire pressure check, fluid check | 10 min | Record hot pressures before they cool |
| — | Skill Block 2: skidpad + cornering line | 40 min | Instructor or experienced driver present |
| — | Cool-down laps, debrief notes | 20 min | Brakes and tires need time to cool before parking |
The Transportation Research Center’s performance driving program uses a similar progression from basic car control to at-limit handling, with specialized wet and dry pads for each phase. The Autobahn Country Club Advance Performance Series adds in-car video analysis and data-enhanced coaching to this kind of structured session plan.
Is your car ready for a track day? Vehicle prep checklist
Do this inspection two to three days before the event, not the morning of. You want time to fix anything you find. The HPDE first-timer checklist from Track Minded makes this point clearly: pre-event prep done early is what separates a smooth day from a car that gets turned away at tech inspection.
Tires and wheels
Check tread depth across the full width of each tire. Uneven wear signals an alignment or pressure problem. Look at the sidewalls for cracks, bubbles, or any sign of cord exposure. A tire that looks fine on the tread can fail at the sidewall under sustained cornering load. Check the age: tires older than six years should be replaced before track use regardless of tread depth. For alignment and tire selection considerations, the Frenzycars wheel alignment and tire guide covers what to look for before a performance session.
Torque all lug nuts to the manufacturer’s specification with a calibrated torque wrench. Re-check after the first session.
Tire pressure: Set cold pressures at your baseline and record them. After the first session, check hot pressures immediately on exit. The sidewall maximum is not your target; it is a structural limit. The Chicago Region SCCA track-day guide notes that cold baseline and expected hot increase should both be tracked between sessions so you can adjust accordingly.
Brakes
| Item | Threshold | Action if Below |
|---|---|---|
| Brake pad thickness | 3mm minimum | Replace before event |
| Brake rotor condition | No cracks, scoring, or blue heat discoloration | Inspect; replace if cracked |
| Brake fluid type | DOT4 or DOT5.1 recommended | Flush if older than 2 years or unknown spec |
| Brake pedal feel | Firm, no sponginess | Bleed system; check for leaks |
Brake fluid absorbs moisture over time, which lowers its boiling point. On track, brakes run far hotter than street driving. A soft pedal mid-session is a brake-fluid boiling problem, not a pad problem. Use a fluid with a high dry boiling point and flush it before your first event of the season. For a deeper look at brake upgrade options and how pad compounds affect track performance, the Frenzycars brake upgrade guide breaks it down tier by tier.
Fluids and consumables to bring
- Some spare engine oil for your car
- Fresh brake fluid (DOT4 or DOT5.1 as required)
- Coolant (pre-mixed or concentrate matching your car’s spec)
- Tire pressure gauge (analog or digital)
- Torque wrench with the correct socket for your lug nuts
- Portable tire inflator
- Basic tool kit: ratchet set, pliers, zip ties, electrical tape
- Jack and jack stands
- Tow strap or tow hook
Thermal management is a real concern at track days. If your car runs hot under sustained load, read the Frenzycars guide on why performance cars overheat before your first session.
What safety gear do you need for an HPDE event?
Event etiquette and flag meanings
- Attend the drivers’ meeting. It is mandatory and covers the specific rules for that day’s event.
- Passing rules: Most HPDE events use a point-by system. You do not pass unless the car ahead points you by. Never pressure another driver or pass without a signal.
- Respect run groups. Beginner groups run at lower speeds with instructors. Do not push the pace beyond your group’s intent.
- Flag responses:
- Green: track is clear, session is live
- Yellow (stationary): hazard ahead, no passing, slow down
- Yellow (waving): immediate hazard, be prepared to stop
- Red: stop immediately and return to pit lane safely
- Black (pointed at you): come in next lap; something is wrong with your car or behavior
- Checkered: session over; complete your lap and return to pit lane
Confirm all gear requirements directly with the event organizer before arrival. Requirements differ between SCCA Track Days, Track Night in America presented by Tire Rack, and club-specific HPDE programs.
What mistakes do instructors correct most often?
Looking too close
The single most common beginner error. Drivers fix their eyes on the hood or just past the front bumper, which compresses reaction time and makes every input late. The fix is mechanical: pick a reference point at the track-out before you reach the apex, and force your eyes there. It feels like you are ignoring the corner. You are not; your peripheral vision handles the near field while your conscious attention handles the far one.
One-handed steering
Resting a hand on the gear lever between shifts is a habit that costs you feedback and puts your arm in the path of an airbag deployment. The AMG Driving Academy handbook is specific: keep both hands at 9 and 3 except during the shift itself, then return immediately. Hand-over-hand is for parking lots and very tight hairpins, not for open-track cornering.
Abrupt inputs
Jerking the wheel, stabbing the brake, or snapping the throttle on all shift weight suddenly and can break traction without warning. Smooth does not mean slow; it means progressive. A brake application that builds to threshold over half a second is faster and safer than one that hits maximum pressure instantly.
Chasing speed instead of control
“Speed is a byproduct of control. Chase control, and the speed comes. Chase speed, and you will find the wall.” — Instructor consensus across HPDE programs
Beginners who focus on lap time before mastering the line and brake points consistently plateau earlier and make more mistakes. Set a process goal for each session (“find the apex on Turn 3 consistently”) rather than a speed goal.
Pro Tip: After each session, write down one specific thing you want to fix and one thing that worked. Show it to your instructor before the next run. Drivers who debrief with notes improve faster than those who rely on memory alone.
On public roads
Never apply threshold braking, trail braking, or late-apex lines on public roads. These techniques require a clear, known surface with no oncoming traffic and no pedestrians. The controlled environment of an HPDE event is where they belong.
Key Takeaways
A complete performance driving techniques checklist covers vehicle prep, safety gear, in-car skill progression, structured drills, and post-session debrief, with straight-line braking and vision as the mandatory first skills to master.
| Point | Details |
|---|---|
| Start with braking and vision | Run the straight-line braking plus vision drill before attempting any cornering technique. |
| Prep the car 2–3 days early | Check brakes, tires, fluids, and lug torque before the event day, not the morning of. |
| Helmet certification matters | Confirm your helmet meets the event’s specific standard (Snell SA2020, SFI, or ECE) before arrival. |
| Control before speed | Master the cornering line and brake release before introducing trail braking or at-limit inputs. |
| Debrief every session | Write one fix and one success after each run; share it with your instructor for faster improvement. |
The checklist is only as good as the environment you use it in
Most drivers who pick up a performance driving checklist treat it as a theory document. They read it, nod along, and then go to their first track day and forget half of it under pressure. The checklist works when you use it as a pre-session ritual, not a one-time read.
What actually separates drivers who improve quickly from those who plateau is not talent or car spec. It is the feedback loop: a structured drill, a debrief, a specific correction, and another run. That loop is what programs like the Radford Racing School advanced driving curriculum are built around, and it is what you can replicate at any HPDE event with a willing instructor and a notebook.
One thing most checklists underemphasize: the mental side. Setting a measurable, process-based goal before each session (“I will find the end-of-braking reference on Turn 4 every lap”) is more useful than a vague intention to “drive better.” The goal gives your instructor something concrete to watch for, and it gives you something concrete to evaluate afterward.
If you are researching vehicles for track use or want model-specific prep notes, the Frenzycars car specs database is a practical starting point. And if you are thinking about insurance implications for a car you use at occasional track events, the Frenzycars liability vs. full coverage guide covers what you need to know.