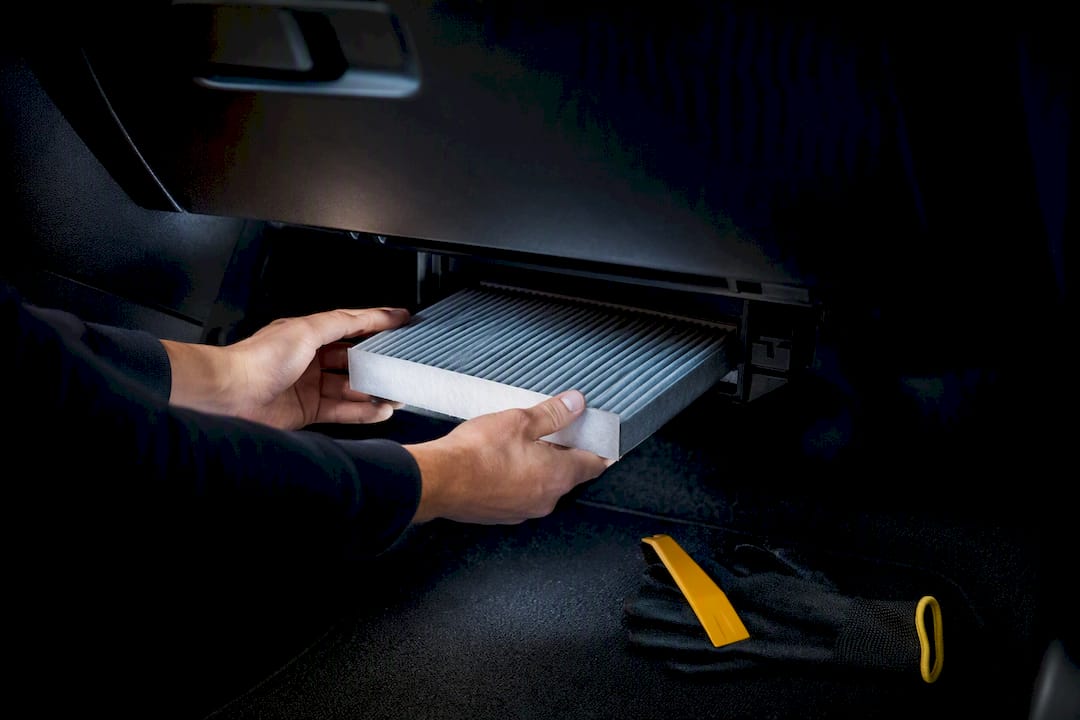
Yes, you can change your own cabin air filter, and it takes most owners just 10 to 20 minutes with no mechanic required. Parts typically cost between $15 and $50, no special tools are usually needed, and the payoff is immediate: better airflow, less musty odor, and a blower motor that isn’t straining against a clogged filter. Skip this job long enough and you’re looking at reduced HVAC performance and, eventually, a pricier repair.
TL;DR:
- Checking and replacing a cabin air filter is a quick DIY task that typically takes 10 to 20 minutes and costs between $15 and $50.
- The filter is usually located behind the glove box, under the hood near the windshield, or under the dash, with location depending on vehicle model.
- Signs of a clogged filter include weak airflow, musty odors, increased windshield fogging, visible dust, and louder fan noise.
- Visual inspection and condition-based checks are more effective than relying solely on mileage intervals; replace sooner in dusty or pollen-heavy environments.
- Proper disposal involves sealing the old filter and considering recycling options for activated charcoal types, avoiding cleaning or reusing saturated media.
What You Need Before You Start a Cabin Air Filter Change
You probably already own everything required. A flat-head or Phillips screwdriver handles most clips, though some vehicles need a small trim tool to pop the glove box free without cracking the plastic. Keep these on hand:
- A screwdriver (flat-head or Phillips, depending on your vehicle)
- A plastic trim tool for stubborn clips
- A small shop vacuum for debris in the housing
- Disposable gloves, since old filters can be genuinely gross
Finding the right part matters more than the tools. Check your owner’s manual first, or look up your filter by year, make, and model on a parts retailer’s website. You’ll see it listed as a “cabin filter,” “pollen filter,” or “climate filter,” all meaning the same part. Auto parts stores and online retailers both carry them, typically in that same $15 to $50 range depending on whether you choose a basic pleated filter or one with activated charcoal.
Where Is the Cabin Air Filter Located?
Cabin air filters live in one of three common spots, and figuring out which applies to your car takes about 30 seconds.
- Behind the glove box: the most common location on sedans and crossovers; the glove box drops down or unclips to expose the housing.
- Under the hood: near the base of the windshield on the passenger side, tucked into the cowl area on some trucks and SUVs.
- Under the dash: less common, but a few models hide the housing low near the passenger footwell.
Some vehicles, particularly larger SUVs and trucks with rear climate zones, run two filters instead of one. A quick search of your model online will confirm whether that applies to you. While you’re in there, be mindful of nearby airbag modules or electrical connectors, especially behind the glove box. You don’t need to touch either one, just avoid yanking wiring or pressing hard near the airbag housing while you work.
How Do You Replace a Cabin Air Filter Step by Step?
This is the part that intimidates people who’ve never popped the hood for anything beyond checking oil. It’s simpler than it sounds, and most replacements take under 15 minutes once you know where to look.
- Turn off the engine and remove the key. Set the blower fan to off. There’s no live current running through the filter housing, but you don’t want the fan kicking on while your hand is inside.
- Access the housing. Lower or unclip the glove box, or open the under hood cover, depending on your vehicle’s layout. Most glove boxes have a small stop tab on each side that you squeeze to let the box swing down further than normal.
- Remove the old filter. Slide it out carefully and look at what you’re holding. Heavy dust, leaves, or a moldy smell tell you exactly how overdue this was.
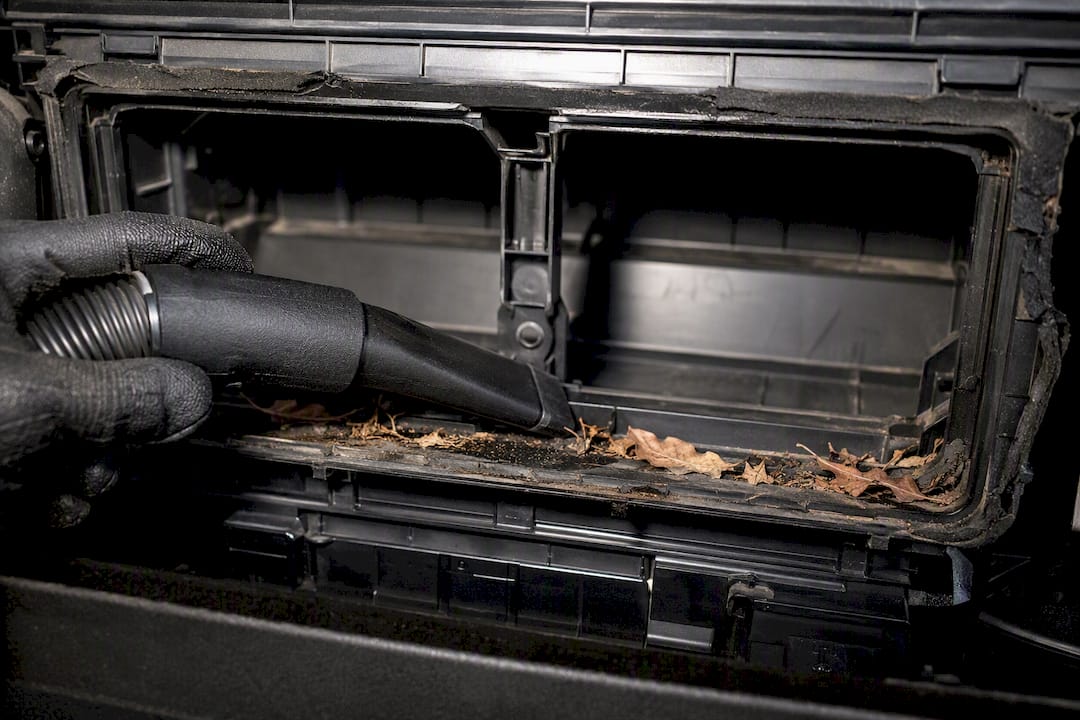
- Inspect and clean the housing. Vacuum out any loose debris, leaves, or bugs before installing the new filter. A dirty housing will contaminate a brand new filter almost immediately.
- Install the new filter facing the right direction. Look for a small arrow printed on the filter frame, it indicates airflow direction, and it needs to point toward the blower motor, not away from it. Installing it backward reduces airflow and filtration.
- Reassemble. Snap the glove box or cover back into place until you hear the clips seat.
- Test it. Run the blower on high, feel for stronger airflow at the vents, and check for any leftover musty smell. Run the defroster for a minute to confirm it’s clearing the windshield properly.
Pro Tip: Snap a quick photo of the old filter’s airflow arrow before you toss it. If the new one doesn’t have a visible arrow printed the same way, the photo settles any doubt about which side faces the blower.
How Often Should You Change the Cabin Air Filter?
The standard guideline lands around 12,000 to 15,000 miles, or about once a year, though some manufacturers stretch the interval as far as 30,000 miles for certain models. That range is a starting point, not a fixed rule.
- Replace sooner if you drive through dusty roads, construction zones, or heavy pollen seasons regularly.
- Replace sooner if you’ve already noticed weak airflow, odors, or excess dust from the vents.
- Always check your owner’s manual for the manufacturer’s specific interval, since it varies by model and climate system design.
A visual check beats guessing by mileage alone. If you pull the filter and it’s caked with debris at 8,000 miles, replace it regardless of what the calendar says. Owners in dry, dusty climates or areas with severe pollen seasons should plan on checking more frequently than the nominal mileage guidance suggests.
What Are the Signs of a Dirty Cabin Air Filter?
A clogged filter doesn’t fail quietly. It announces itself through the vents, and once you know the pattern, it’s hard to miss.
- Weak airflow from the vents even with the fan on high, since restricted media chokes off volume.
- Musty or moldy odors, especially when you first start the AC, caused by trapped moisture sitting in saturated filter material.
- Persistent windshield fogging that’s slow to clear, since reduced airflow weakens the defrost function.
- Visible dust blowing from the vents onto your dashboard or clothes.
- Louder fan noise as the blower motor works harder to push air through a blocked filter.
These four symptoms, reduced airflow, musty smells, windshield fog, and fan noise, are the most commonly reported signs across owner complaints and service records. If you smell mold specifically, or notice standing moisture in the housing itself, that can point to a bigger issue than the filter, sometimes water intrusion or evaporator buildup that a filter swap won’t fix. That’s a case for a professional look, not a driveway fix. For a deeper dive into isolating odor sources versus filter-related smells specifically, diagnosing the actual source of the smell first can save you from replacing a part that wasn’t the problem.
Which Cabin Air Filter Type Should You Buy?
Three main types cover almost every vehicle on the road, and the right pick depends on what’s bothering you.
- Standard pleated paper filters trap dust, pollen, and larger particulates. They’re the cheapest option and work fine for most drivers with no specific complaints.
- Activated charcoal filters add a layer of carbon that absorbs odors from exhaust fumes, road smells, and general HVAC funk, beyond what a standard filter captures.
- HEPA or electret filters use finer media or electrostatically charged fibers to catch smaller particles, useful if allergies are a daily issue for you or a passenger.
Fit matters more than filter type. Confirm the frame dimensions match your housing exactly, whether you buy OEM or aftermarket. A filter that’s a half inch too small will let unfiltered air leak around the edges, defeating the purpose entirely. Charcoal and HEPA options cost a few dollars more than standard filters, generally still within that same $15 to $50 window.
DIY Versus Professional: What’s the Real Cost Difference?
Buying the part yourself keeps you at that $15 to $50 range for the filter alone. Have a dealer or shop handle it, and labor can push the total to $50 to $100 or more, depending on how hard the filter is to access and what the shop charges per hour. For a job that mostly involves a glove box and a few clips, that markup is steep.
- DIY time is generally between 10 and 30 minutes for most vehicles, longer if your model requires partial dashboard removal.
- Mechanics widely consider this one of the simplest, most cost-effective maintenance tasks to handle at home.
- Hire a pro if you find mold on the evaporator, standing water in the housing, a cracked or broken clip, or if your specific model buries the filter behind major trim panels.
If a routine filter swap turns into a bigger discovery, say a cracked housing or a persistent leak, don’t ignore it. Small HVAC issues left unaddressed tend to escalate the same way a flashing check engine light signals a problem that gets more expensive the longer it waits.
Frenzycars Field Notes: Tips From Ramón
A few habits separate a clean cabin filter change from a repeat trip to the parts store. Photograph the old filter’s airflow arrow before disposal, so you never guess at orientation during install. Note the part number and jot the date and mileage into a maintenance log, the same way you’d track other DIY procedures worth documenting step by step.
If airflow still feels weak after the swap, vacuum the housing again and check the intake for leaves or debris. Torn seals around the housing edge let unfiltered air sneak past a brand new filter, so replace them if you spot damage. Mold that keeps returning after a fresh filter points to a deeper HVAC issue, not a filter problem, and that’s a job for a shop. Pair this task with your broader scheduled maintenance checklist so it doesn’t fall through the cracks between oil changes.
How Should You Dispose of an Old Cabin Air Filter?
The old filter you just pulled out is holding months of dust, pollen, mold spores, and whatever else got trapped in the media, so don’t just toss it in the regular household trash bin without a second thought, though for most standard paper filters that’s technically where they end up.
Standard pleated paper filters are generally accepted as regular waste in most municipal trash programs, since they don’t contain hazardous materials. Still, a few habits make disposal cleaner and safer. Seal the used filter in a plastic bag before tossing it, especially if it’s visibly moldy or caked in dust. That keeps loose debris from scattering in your garage or garbage bin and keeps you from breathing it in while you carry it outside.
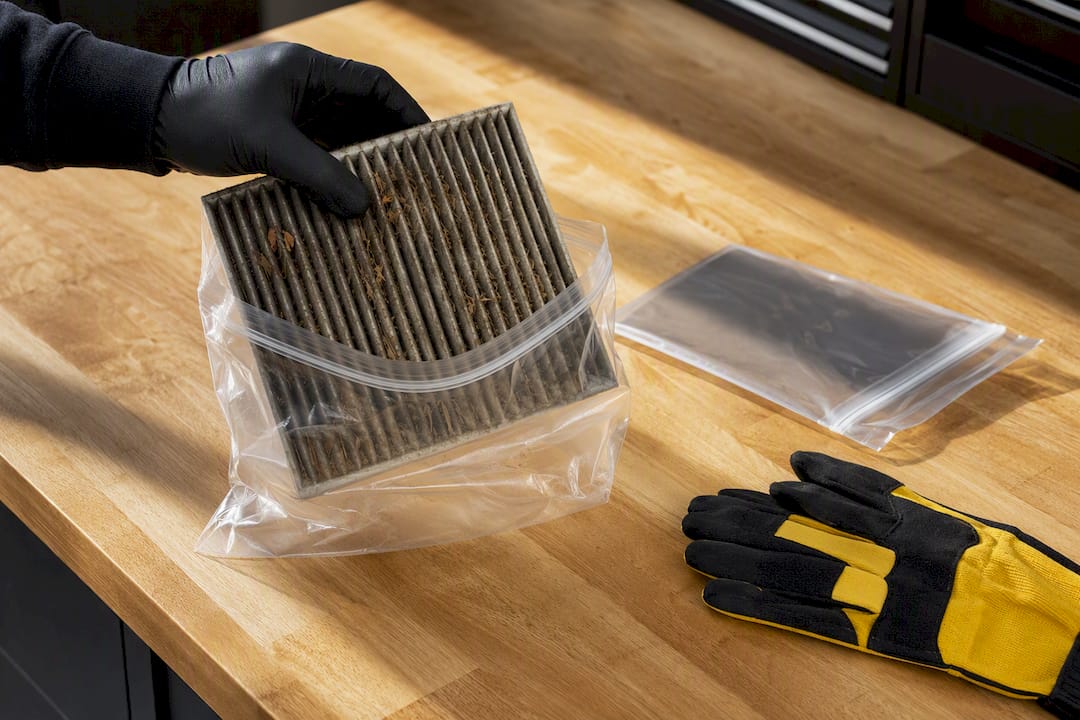
If your filter uses an activated charcoal layer, some auto parts stores accept old filters for recycling alongside other core-exchange parts, so it’s worth asking when you buy the replacement. Never burn an old cabin filter or attempt to clean and reuse a badly saturated one. Once the media is compressed with debris or damp with trapped moisture, cleaning won’t restore its filtering capacity, and reinstalling it just delays the inevitable second replacement.
Wear gloves when handling a heavily soiled filter, particularly if you or anyone in the household deals with allergies or asthma. The dust that’s built up over 12,000 miles isn’t something you want on bare skin or, worse, shaken loose near your face.
What Happens if You Never Replace the Cabin Air Filter?
Skipping this maintenance doesn’t just mean a slightly stale smell in the car. A saturated filter forces the blower motor to work harder to push air through blocked media, and that added strain increases wear on the HVAC system over time. What starts as a $20 part swap can turn into a blower motor repair costing several times that if you let it go long enough.
The allergy impact is the part most owners underestimate. A clogged filter doesn’t just let less air through, it lets more of the wrong air through. Trapped dust, pollen, and mold spores that the filter can no longer capture end up circulating straight into the cabin every time you run the fan. For anyone with seasonal allergies or asthma, that’s a daily dose of irritants blowing directly at their face on the commute.
There’s also a visibility and safety angle that’s easy to overlook. A neglected filter weakens defrost and defog performance, since the system can’t move enough air to clear moisture off the windshield efficiently. That’s a real problem on a cold, foggy morning when you need the glass clear immediately, not after a slow three-minute wait. None of this requires a mechanic to diagnose. It just requires not putting off a 15-minute job for another 6,000 miles.
Where to Find Vehicle-Specific Guidance
Your owner’s manual remains the definitive source for your model’s exact replacement interval and access instructions. Beyond that, manufacturer service schedules and retailer DIY pages cover model-specific steps in more visual detail, useful if your vehicle’s housing looks nothing like the general steps above. If you’re double-checking part specs for your exact trim, Frenzycars’ vehicle spec lookup is a fast way to confirm details before you order.
Why Mileage Alone Isn’t the Right Trigger for This Job
The mileage number gets repeated everywhere, and it’s not wrong, but it’s incomplete. Treating 12,000 to 15,000 miles as a hard deadline misses the point of the interval in the first place. It’s a baseline for average conditions, not a promise that your filter will last exactly that long.
What the research actually supports is a condition-based approach layered on top of the mileage guideline. If you commute through construction dust, live somewhere with brutal pollen seasons, or park under trees that shed constantly, your filter is working harder than the average case the manufacturer’s number assumes. Pull it and look. A visual check takes less time than reading this section, and it tells you more than any mileage sticker ever will.
Where conventional advice really falls short is treating this as a “check the manual, mark the calendar” task and nothing more. The manual gives you a starting point. Your actual driving conditions, and a two-minute look at the filter itself, tell you the truth. Prioritize the visual check over the calendar every time the two disagree, and you’ll never run a cabin filter longer than it should go. That’s the whole job, done right, more often than the sticker says and never later than it needs to be.
Sources
- How to Tell if Your Cabin Air Filter is Dirty | FRAM
- The Importance of Servicing Cabin Air Filters (Filter Manufacturers Council / Auto Care Association)
- How Much Does It Cost To Replace A Cabin Air Filter? | J.D. Power
- Cabin Air Filter Replacement - Step by Step Guide | AutoZone