
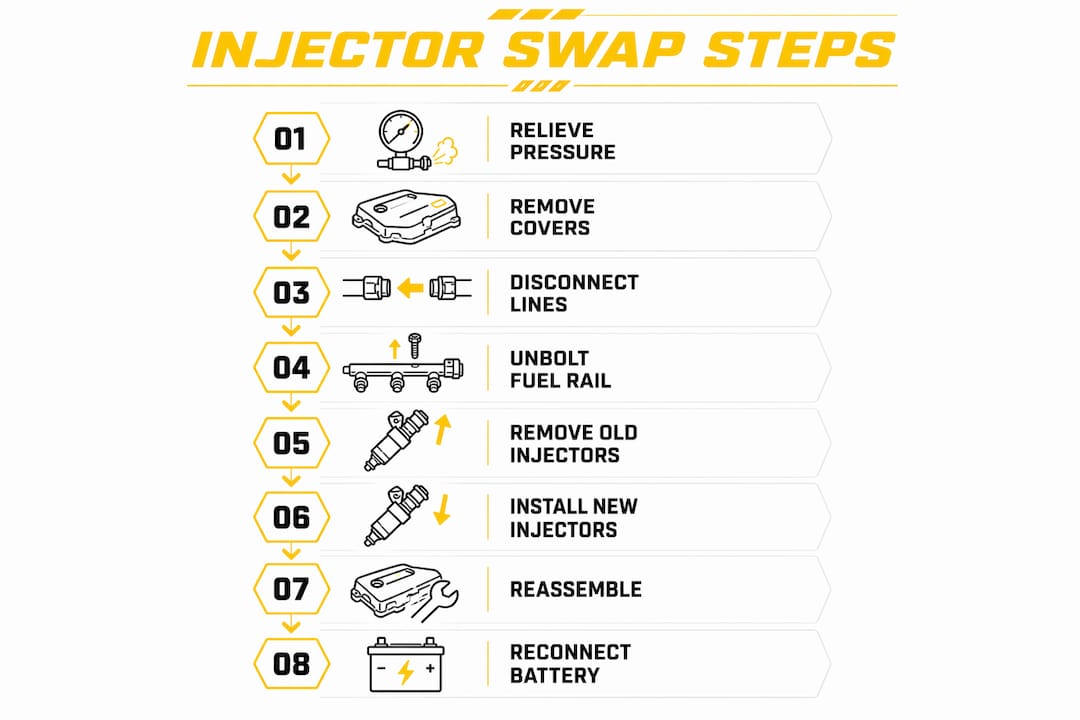
Upgrading fuel injectors comes down to eight mechanical steps: relieve fuel pressure, disconnect the battery, access the fuel rail, remove old injectors, install new injectors with lubricated O-rings, torque the rail back to spec, prime the system, verify with a leak check and a scan tool before driving.
Here is the complete sequence at a glance:
- Relieve fuel system pressure (pull pump fuse/relay, crank until stall)
- Disconnect the negative battery terminal
- Remove engine covers and intake components for access
- Disconnect fuel lines and injector electrical connectors
- Unbolt and lift the fuel rail with injectors attached
- Pull old injectors; inspect and clean bores and rail ports
- Fit new O-rings with a light coat of clean engine oil; seat new injectors
- Torque fuel rail bolts to manufacturer specifications; many manufacturers specify 8–12 ft-lbs, so confirm your vehicle’s service manual.
- Reconnect connectors, fuel lines, and battery
- Prime by cycling ignition to ON several times before cranking
- Inspect for leaks under pressure
- Scan for codes; monitor fuel trims at idle
- If injector flow changed, take the car to a tuner for ECU scaling
Safety first, always. Gasoline ignites at concentrations as low as 1.4% in air. Work in a ventilated, spark-free space with a Class B fire extinguisher within arm’s reach before you loosen a single fitting.
Pro Tip: Photograph every harness connection and the injector orientation before you touch anything. That two-minute step saves 20 minutes of guessing during reassembly.
What do you need before starting the job?
Getting caught mid-job without the right part is more than annoying — with a fuel system open, it is a genuine fire hazard. Buy everything before you crack the hood.
Parts checklist:
- Matched injector set (same flow rating and impedance across all cylinders)
- New upper and lower O-rings for each injector (often sold with injectors)
- Retaining clips if your application uses them
- Fuel rail seals and any worn fuel line fittings
- Fuel filter (good time to replace it)
- Upgraded fuel pump if your new injectors demand higher flow
Tools checklist:
- Torque wrench suitable for the recommended 8–12 ft-lb range specified by many manufacturers (verify for your vehicle).
- Socket set and combination wrenches
- Fuel line disconnect tool (quick-connect style varies by platform)
- Multimeter (for injector impedance verification)
- Fuel pressure gauge (optional but useful for post-install verification)
- O-ring lubricant or clean engine oil
- Drip pans and clean rags
- Nitrile gloves and safety glasses
- Class B fire extinguisher
Safety prep:
Work outdoors or in a garage with the door open. No running engines nearby, no power tools that spark. Disconnect the negative battery terminal before touching any electrical connector. Have a drain plan: even a properly relieved system holds residual fuel in the rail. Cap disconnected lines immediately with clean rags or rubber plugs.
Critical: Never use petroleum grease or silicone lubricant on injector O-rings. Both degrade rubber seals and contaminate the fuel system. Clean engine oil only.
Pro Tip: Buy a spare set of O-rings even if new ones come with the injectors. A pinched O-ring discovered at reassembly with no spare on hand means the job stops cold.
Should you replace or upgrade, and how do you size injectors?
These are two different decisions. Replacement means swapping failed or degraded injectors for stock-equivalent units. Upgrade means installing injectors with higher flow to support more power.
Replace when you see:
- Misfire codes (P0300 series) with no ignition fault
- Rough idle or hunting idle
- Poor fuel economy without another obvious cause
- Injector electrical failure (open or short circuit confirmed with a multimeter)
- Visible leaking or cracked injector body
Upgrade when you are:
- Chasing a power target that exceeds your stock injectors’ capacity
- Running forced induction (turbo or supercharger) on a previously naturally aspirated engine
- Converting to E85, which requires roughly 30% more fuel volume than gasoline
- Building a high-BSFC engine where stock injectors are at or above 85% duty cycle
How to size injectors
The standard sizing formula uses four inputs: horsepower target, BSFC (brake-specific fuel consumption), number of injectors, and a target duty cycle. Injector sizing should target a maximum duty cycle of around 80% to leave headroom for fuel pressure variation and tuning.
- Estimate BSFC: use 0.55–0.60 for naturally aspirated builds, 0.60–0.65 for forced induction.
- Calculate total fuel flow: HP target × BSFC = fuel flow in lb/hr.
- Divide by number of injectors: fuel flow ÷ injector count = per-injector demand.
- Divide by duty cycle: per-injector demand ÷ 0.80 = minimum injector flow rating in lb/hr.
Example: 400 hp forced-induction build, 4 injectors, BSFC 0.65. 400 × 0.65 = 260 lb/hr total. 260 ÷ 4 = 65 lb/hr per injector. 65 ÷ 0.80 = 81 lb/hr minimum, or roughly 850 cc/min.
Compatibility checklist before you buy:
- Impedance: High-impedance injectors (12–16 ohms) work with most factory ECUs. Low-impedance units (2–3 ohms) need a peak-and-hold driver. Confirm your ECU type before ordering.
- Connector style: Jetronic/EV1, USCAR/EV6, and Denso are the most common. A wrong connector means splicing harnesses.
- Physical length and O-ring diameter: Measure your stock injectors or confirm with a fitment guide. A millimeter of difference in length can prevent proper seating.
- Characterization data: Prefer injectors that ship with a data sheet listing flow at reference pressure, latency/dead-time across voltage, and matched-set deviation. This data cuts tuning time significantly.
Pro Tip: Bigger injectors do not add power on their own. They remove a fuel delivery bottleneck only when airflow, pump capacity, and ECU calibration all support the additional fuel. Size the pump at the same time.
How to perform the fuel injector swap, step by step
Done carefully, the physical swap takes two to four hours on most port-injected engines. The goal: old injectors out, new injectors seated and sealed, system primed and leak-free before you crank.
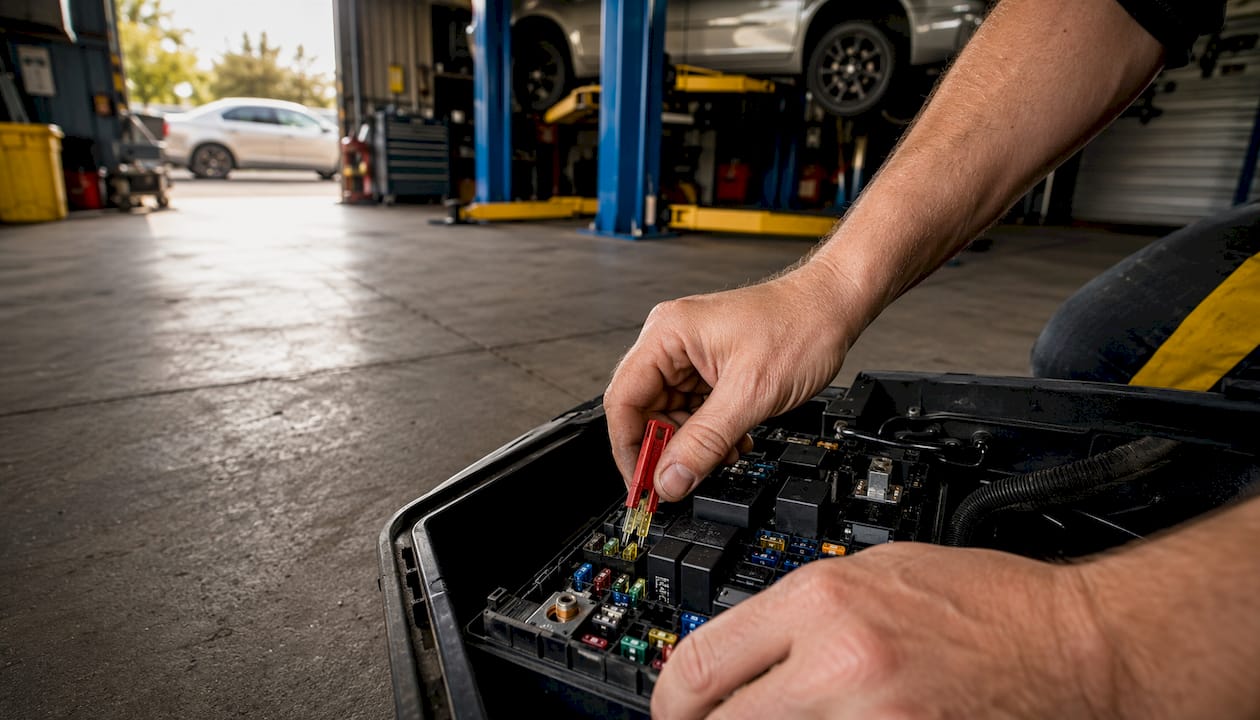
Step 1: Relieve fuel system pressure and disconnect the battery. Pull the fuel pump fuse or relay (location is in your owner’s manual), then crank the engine until it stalls. This exhausts rail pressure. Turn the ignition off. Disconnect the negative battery terminal. Do not skip either sub-step — a pressurized rail sprays fuel at face level when a fitting breaks loose.
Step 2: Remove engine covers and intake components. Take off any plastic covers, the air intake duct, and any components blocking rail access. Photograph every connector, bracket, and vacuum line before removal. Label connectors with masking tape if your phone camera is not handy.
Step 3: Disconnect fuel lines and electrical connectors. Use the correct fuel line disconnect tool for your fittings — forcing a quick-connect damages the fitting seat. Have a rag under each connection before you pull it. Cap disconnected lines immediately. Unplug each injector connector; most have a tab or clip that releases with light thumb pressure.
Step 4: Unbolt the fuel rail and lift it free. Remove the rail mounting bolts. Note their torque spec in your service manual; many manufacturers specify 8–12 ft-lbs for aluminum rails, but your vehicle may differ. Lift the rail slowly. Injectors often stay seated in the manifold — use a gentle twisting motion to free them, never a pry bar.
Step 5: Remove old injectors and clean the bores. Pull each injector straight out. Remove old O-rings completely; a fragment left in the bore causes a leak. Inspect each injector bore and rail port for carbon deposits or debris. Wipe clean with a lint-free rag. If you want to bench test the old injectors before discarding them, do it now (see the bench testing section below).
Step 6: Install new injectors. Fit new O-rings onto each injector. Apply a thin, even coat of clean engine oil to every O-ring — this is the single most important installation detail. A dry O-ring tears during insertion and creates a leak that only shows up under hot, pressurized conditions. Press each injector into the rail port until it seats firmly. Do not cock or force it.
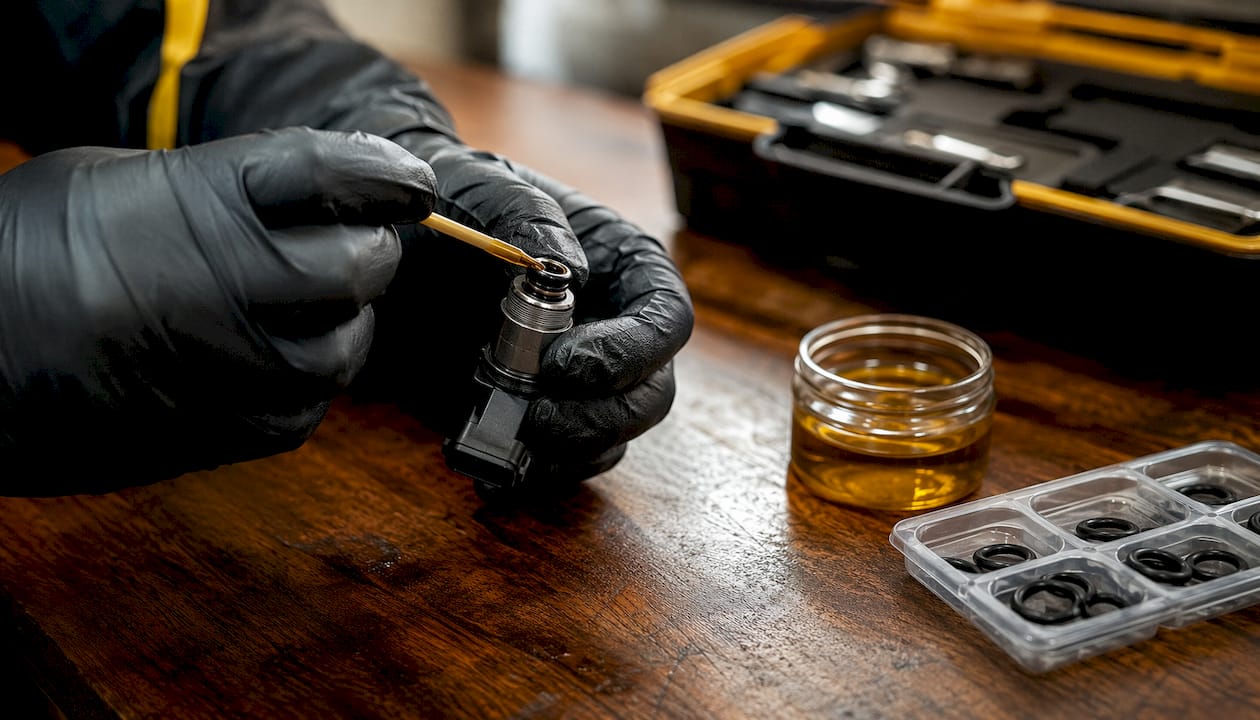
Lower the rail assembly into the manifold, guiding each injector into its bore simultaneously. Hand-start all rail bolts before torquing any of them. Torque in a crisscross pattern to the manufacturer’s specification to avoid warping the rail.
Step 7: Reconnect connectors, fuel lines, and battery. Push each electrical connector onto its injector until it clicks. Reconnect fuel lines and confirm each fitting is fully engaged. Replace the fuel filter if you pulled it for access. Reconnect the negative battery terminal.
Step 8: Prime the system and check for leaks. Cycle the ignition to ON (do not crank) for five to ten seconds, then back to OFF. Repeat three to four times. This lets the pump pressurize the rail without cranking. With the system pressurized, inspect every injector seat, rail fitting, and fuel line connection for drips or fuel smell. Only after a clean visual check should you crank the engine.
Common post-swap problems:
- Fuel leak at injector seat: O-ring is pinched or not fully seated. Depressurize, pull the rail, reseat the injector.
- No-start: Confirm the pump fuse is reinstalled, fuel pressure is present, and injector connectors are clicked in.
- Rough idle immediately after start: Check injector seating and connector engagement before assuming a tuning issue.
Pro Tip: Keep new injectors capped with their protective plugs until the moment of installation. A single debris particle in the nozzle tip can cause a misfire that looks like a tuning problem.
Why does your ECU need updating after an injector upgrade?
Installing larger injectors without updating the ECU is the most common and most damaging mistake in this job. The ECU commands fuel delivery based on pulse width calibrated to your stock injectors’ flow rate and latency. Swap in larger injectors and the same pulse width delivers far more fuel — the engine runs rich, floods, and may not start at all.
“Plug-and-play” claims for performance injectors can be misleading; many still require ECU scaling for stable idle and part-throttle drivability even when marketed as direct replacements.
Two injector parameters matter beyond raw flow:
- Latency (dead time): The delay between the ECU’s open command and actual fuel flow. It varies with battery voltage and differs between injector models. If the tuner enters the wrong latency value, idle and light-throttle fueling will be off even if the full-load map is correct.
- Offset/slope: The linear relationship between pulse width and delivered fuel volume. Accurate offset data is what makes part-throttle fueling precise.
What to bring your tuner:
- Injector flow rating (cc/min or lb/hr at reference fuel pressure)
- Latency/dead-time table across operating voltage (if the supplier provides it)
- Matched-set flow deviation (how closely the injectors are matched)
- Impedance value
- Injector part number and connector type
Warning: Installing larger injectors without confirming fuel pump capacity can cause pressure to collapse under load. A lean condition at high RPM and load is one of the fastest ways to destroy pistons and bearings.
Pro Tip: Buy injectors that are already in your ECU software’s injector library. Brands like Injector Dynamics and Bosch Motorsport publish full characterization data sets that major platforms like Haltech, MoTeC, and AEM accept directly, cutting tuning time from hours to minutes.
How do you verify the job after the swap?
Run through this checklist before any aggressive driving.
Boot-up sequence:
- Cycle ignition to ON, hold five seconds, back to OFF. Repeat three times.
- Crank and start. Note how quickly it fires.
- Let it idle two to three minutes. Watch for stumble, hunting, or misfires.
- Connect a scan tool. Read live short-term fuel trims (STFT). Values within ±5% at idle suggest the base calibration is reasonable; values beyond ±10% point to a fueling or seating issue.
- Check for any stored codes. Clear them, then re-test.
- Light road test at partial throttle. No hard acceleration until a tuner has confirmed the calibration.
Troubleshooting quick-reference:
- Small fuel leak at rail: Depressurize, pull the rail, inspect O-rings for pinching or tearing.
- No fuel pressure: Confirm pump fuse is in, pump relay is seated, and fuel line connections are fully engaged.
- Rough idle with no codes: Verify injector seating and connector engagement; check that latency data is entered correctly if the ECU was already updated.
- Persistent misfire codes: Confirm injector impedance matches ECU driver type; check for debris in nozzle.
When to call a professional: Persistent leaks after two O-ring reseating attempts, inability to achieve fuel pressure, or misfire codes that return after clearing all point to a problem beyond a simple DIY fix. Tuning adjustments always require a professional with a wideband and a dyno or data-logging setup. AFR logs, injector duty cycle, and fuel pressure traces are what a tuner needs to validate the new setup across the full load and RPM range.
How do you dispose of old fuel injectors responsibly?
Old injectors are not household trash. They contain residual fuel and hydrocarbon contamination, which makes them hazardous waste in most U.S. states.
Drain residual fuel into a sealed metal container and take it to a local household hazardous waste (HHW) facility. The EPA’s waste disposal locator helps you find the nearest certified drop-off. Many auto parts retailers — AutoZone, O’Reilly Auto Parts, and Advance Auto Parts among them — accept used automotive parts and fluids for recycling at no charge.
If the injectors are still functional, consider selling or donating them. Rebuilt injector suppliers often buy cores. A working set of stock injectors has real value to someone doing a straight replacement on a budget build. Clean them externally, bag them with the part number labeled, and list them on forums or parts marketplaces.
Metal injector bodies are recyclable as scrap steel once drained and cleaned. Check with your local scrap yard about their policy on fuel system components.
How do you bench test injectors before installing them?
Bench testing new injectors before they go in the car catches a defective unit before it causes a no-start or a lean cylinder. It takes about 15 minutes per injector with basic equipment.
What you need: a 12V power source, two wires with alligator clips, a container to catch fuel, and a fuel supply (a small pressurized fuel source or an injector cleaning/testing kit like those from Delphi or Injector RX).
Steps:
- Connect the injector to the 12V source using the alligator clips, matching polarity to the injector’s two terminals.
- Apply fuel pressure to the inlet (use a testing kit or a pressurized fuel line from a running vehicle’s test port).
- Pulse the injector by briefly connecting and disconnecting power. A healthy injector produces a clean, cone-shaped spray pattern.
- Check for drips when the injector is closed and pressurized. Any drip-through indicates a leaking needle seat — do not install that injector.
- Listen for a clean click on open and close. A dull or absent click suggests a stuck needle or coil failure.
- Compare spray pattern and volume across all injectors in the set. Significant variation in pattern or volume points to a flow mismatch that will show up as a cylinder-to-cylinder AFR difference on the dyno.
A matched set from a reputable supplier should show consistent spray patterns and no drip-through. If one injector fails, contact the supplier before installation — most will replace a defective unit under warranty.
Key Takeaways
Completing a fuel injector swap safely and reliably requires pressure relief first, precise O-ring fitment, and ECU calibration data ready for your tuner before you ever drive the car hard.
| Point | Details |
|---|---|
| Relieve pressure first | Pull the fuel pump fuse and crank until stall before loosening any fitting. |
| Lubricate every O-ring | A thin coat of clean engine oil prevents tears that cause hot, pressurized leaks. |
| Torque rail bolts to spec | Many manufacturers specify 8–12 ft-lbs; always confirm in your vehicle’s service manual. |
| ECU scaling is mandatory | Changing injector flow without updating the ECU risks rich flooding or dangerous lean conditions. |
| Bring full injector data to the tuner | Flow rating, latency table, impedance, and part number cut tuning time and reduce drivability risk. |
The part most guides skip
Most fuel injector walkthroughs treat the mechanical swap as the hard part and wave at tuning as an afterthought. In practice, it is the opposite. Getting the injectors seated without a torn O-ring is a 20-minute skill once you have done it twice. Getting the ECU calibration right — especially latency at low voltage — is where builds go sideways for weeks.
The injectors that cause the fewest headaches are the ones that come with a published latency curve and are already in your ECU platform’s library. That is not a luxury for race builds. It matters just as much on a street car that needs to idle cleanly at 190°F coolant temp in traffic. If a supplier cannot give you a voltage-referenced latency table, that is a real red flag worth acting on before you buy.
One more thing worth saying plainly: if you are not confident reading fuel trims on a scan tool and interpreting what they mean, get a tuner involved before the first road test, not after a lean misfire at 5,000 RPM. The performance maintenance checklist at Frenzycars covers the broader context of keeping a modified car reliable. The mechanical swap is satisfying to do yourself. The tuning validation is where you protect the investment.
Useful sources
The sources below were used in researching this guide and are worth bookmarking for deeper reference on specific steps.
- KemsoFuelPump: Complete Guide to Upgrading Fuel Injectors — Best for safety prep, O-ring lubrication details, and the professional tuning rationale.
- JSPartsOnline: High-Performance Fuel Injector Upgrade Guide — Best for injector sizing formulas, BSFC values, and pump capacity warnings.
- EFISystemPro: Complete Fuel Injector Selection Guide — Best for impedance, connector compatibility, and ECU library data.
- High Performance Injectors: Do You Need a Tune? — Best for understanding why “plug-and-play” claims are often overstated and what ECU scaling actually involves.
- GearsAdvisor: How to Install a Performance Fuel Rail — Best for torque specs and fuel rail installation sequence.
- ProStreet: How to Replace Fuel Injectors — Best for step-by-step removal and O-ring seating detail.
- Frenzycars: Performance Car Maintenance Checklist — Companion reading for post-swap maintenance and keeping a modified car reliable long-term.
- Frenzycars: Why Fuel Economy Ratings Differ from Real-World Results — Useful context on how ECU fuel trim adjustments affect real-world drivability after injector changes.
| Source | Best for |
|---|---|
| KemsoFuelPump | Safety, O-ring prep, tuning rationale |
| JSPartsOnline | Injector sizing, pump capacity |
| EFISystemPro | Impedance, ECU library data |
| High Performance Injectors | ECU scaling and tune necessity |
| GearsAdvisor | Torque specs, rail installation |
| ProStreet | Step-by-step removal, O-ring seating |
| Frenzycars Maintenance Checklist | Post-swap maintenance context |